Steel Buildings & Carports · Buyer's Guide

Before
You Buy

A metal building is a serious investment. This is the complete rundown of everything you need to know and have ready — the ground it sits on, the space to build it, and the approvals that keep it standing legally for decades.

8
Things to Know
3
Surface Options
140mph
Coastal Wind Rating
01
The Ground It Sits On

Foundation &
Surface Options

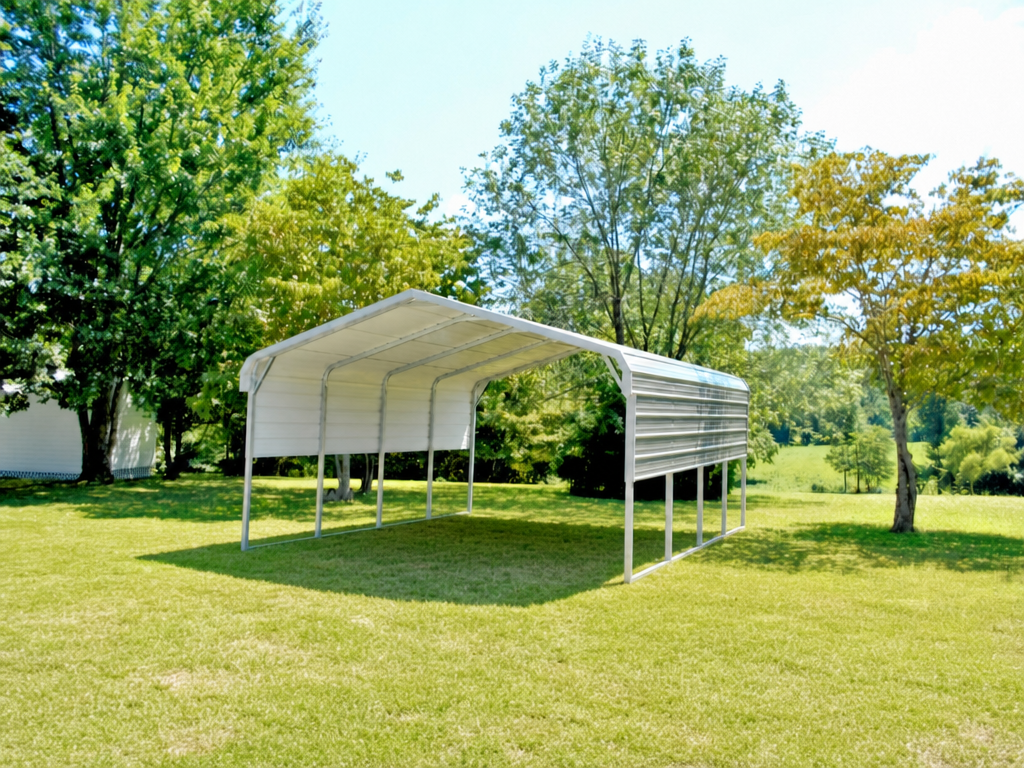
Your building can go on concrete, gravel, or level ground. The right base depends on the building type, how permanent it is, and whether it must be certified for wind and snow. Here is the full breakdown.
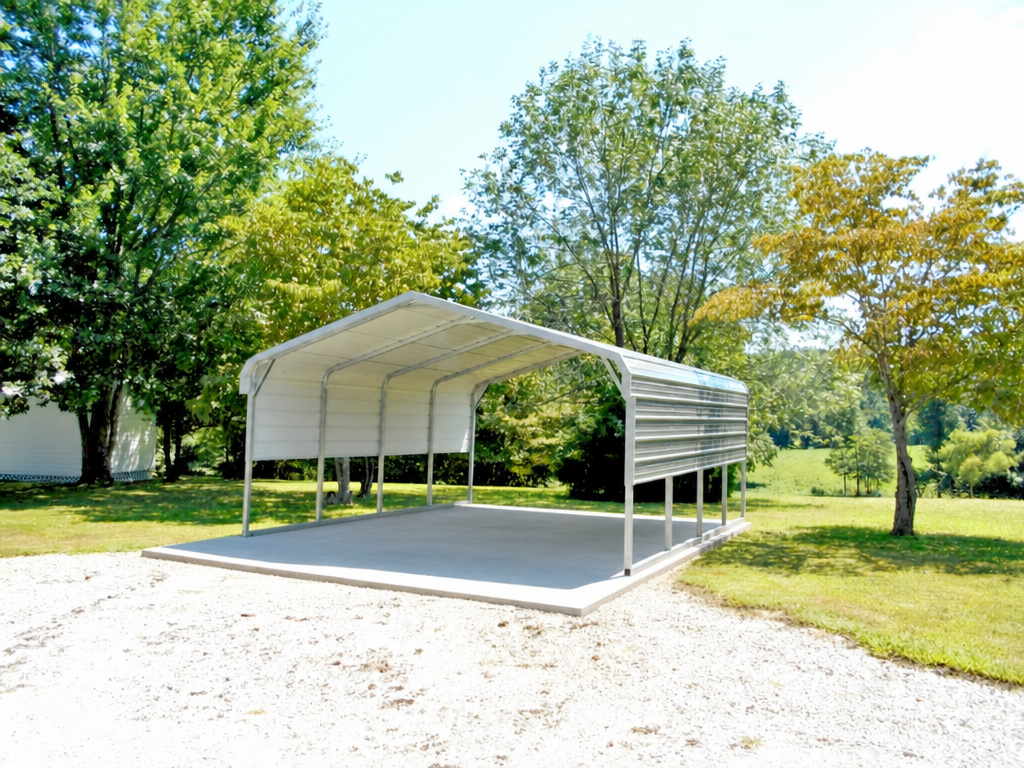
Metal building installed on a concrete slab
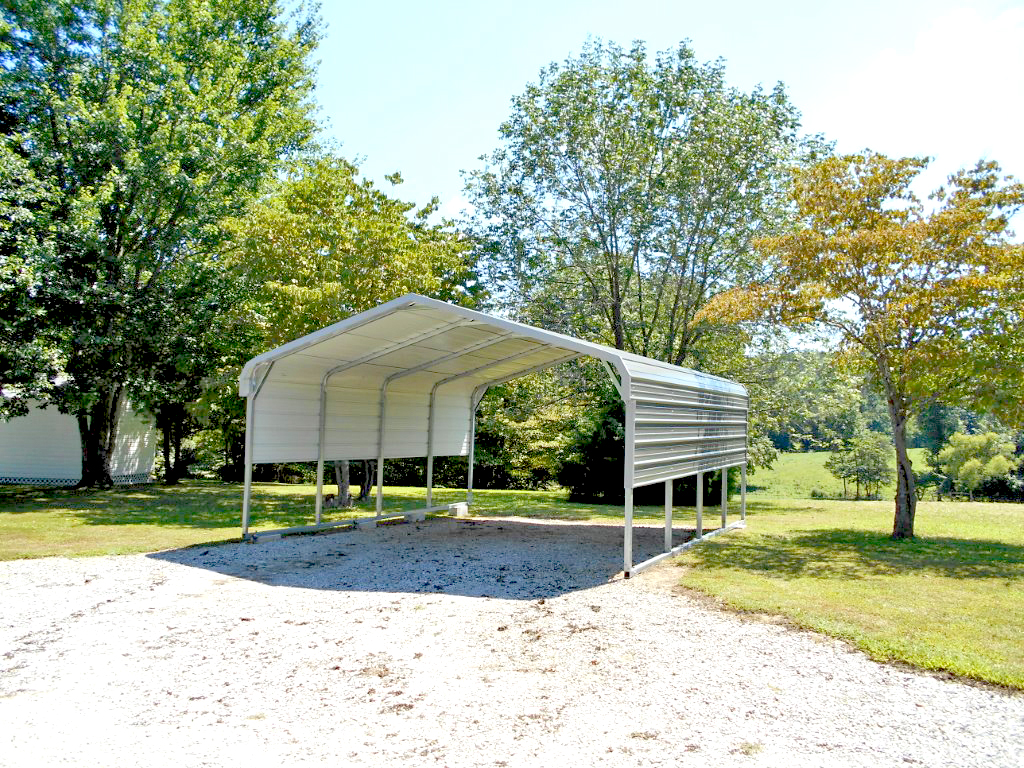
Metal carport installed on a gravel pad
Metal building installed on level ground
Best · Permanent
Concrete
Anchors
1/2" wedge / expansion anchors
Durability
Highest — never shifts or settles
Certified
Yes — best for high wind
Permit-Ready
Yes
Cost
Highest up front, lasts longest
Value · Semi-Permanent
Gravel
Anchors
Auger / mobile-home anchors + rebar pins
Durability
Good — occasional re-leveling
Certified
Yes, with auger anchors
Permit-Ready
Sometimes
Cost
Mid — budget-friendly
Temporary Only
Dirt / Ground
Anchors
36" rebar pins (or auger upgrade)
Durability
Lowest — can shift, sink, flood
Certified
Only with auger anchors — rebar alone cannot
Permit-Ready
Often not accepted
Cost
Cheapest — costly problems later

Concrete Slab — Full Specs

4"
Min Slab (Light Duty)
6"
Commercial / Ag / Habitable
3–4kPSI
Concrete Strength
28days
Min Cure Before Install
  • Anchors: 1/2" concrete wedge / expansion anchors, commonly 1/2"×5.5", ×6", or ×7". Minimum embedment 3.75"–5". Torqued 45–65 ft-lbs. Kept ≥2.5" from the slab edge to prevent edge breakout. Cracked or edge-critical concrete uses epoxy/adhesive anchors rated for cracked concrete.
  • Thickness: minimum 4" for carports and light-duty garages; 6" for commercial shops, agricultural buildings, and habitable structures; up to 8" for the heaviest equipment.
  • Strength: ~3,000 PSI light use; 3,500 PSI residential garage; 3,500–4,000 PSI commercial, agricultural, and habitable. IBC minimum ground-supported slab is 3.5".
  • Reinforcement: #3 rebar (⅜") grid at 18" on-center both directions, with #4 (½") in thickened edges and footings. Welded wire mesh (6×6 W1.4) for light use only, set in the upper third of the slab. MBMA calls for continuous perimeter rebar, minimum two #4 bars up to 30 ft wide. Fiber is crack control only — not a rebar substitute.
  • Sub-base: compacted gravel beneath the slab for drainage and stability.
  • Slab size: three styles — Edge Offset (outer dims +5" all around), Notched Edge Offset (slightly less), Edge Flush (equals outer dims). All footers ≥4" thick and ≥12" wide.
  • Edge lip: leave ≥3" of slab around the building, or use L-brackets, to prevent edge chipping and anchor blowout.
  • Cure: minimum 28 days before install day.

Foundation Types for Larger Buildings

  • Monolithic slab (thickened edge): single pour combining slab and perimeter grade-beam footing (~12"×12"). Fastest and most affordable — ideal for warm climates and regions with a shallow frost line.
  • Slab + perimeter stem walls: footings poured below the frost line. Preferred for barndominiums so plumbing can be run before the pour.
  • Continuous grade beams / strip footings: for medium-to-large structures.
  • Pier-and-beam (isolated footings): drilled piers at each column — for poor soil, heavy interior loads, or agricultural barns without a finished floor.
  • Footing sizing: 12"×12" standard residential; 24"×24" minimum for 32 ft+ wide (some specs 30"×26" for double/ladder-leg); permitted builds require engineer-stamped footings ≥24"×24".

Gravel Pad — Full Specs

  • Dual anchor system: mobile-home / helical auger anchors 30–36" deep at corners and alternating legs (resist uplift), plus 18–36" rebar pins between them (resist lateral shift). Augers thru-bolted with 3/4" bolts. Never rebar alone on a certified build.
  • Depth: 4–6" of compacted crusher run / road base (has fines) — not smooth round rock, which shifts and never locks in.
  • Extend the pad at least 2 feet beyond the building on every side so the base rail never sits on a crumbling edge.
  • Compaction: spread and compact in thin lifts, a few inches at a time; level the underlying dirt first.
  • Soft soil: lay geotextile fabric under the gravel over clay or mud so rock does not sink over time.
  • Maintenance: gravel can trench and shift over time — it is re-levelable.

Dirt / Bare Ground

  • Anchors: standard is 30–36" rebar pins through the base rail at each leg. Rebar-only cannot be wind/snow certified — upgrade to auger/mobile-home anchors to certify. Optional concrete piers at legs for extra stability.
  • Prep: no pad depth required — just leveled, ideally compacted, ground.
  • Reality: least stable, temporary/seasonal use only. Dirt shifts, sinks, floods, invites moisture and pests, and anchors can move in high wind.
  • Not for permanent structures, workshops, or permitted builds in many jurisdictions. Can be upgraded to a gravel base later.

Which Buildings Require Concrete

Tube-steel carports and small metal garages can install on concrete, gravel, or level ground. Engineered, cold-formed, and clear-span buildings — plus anything 30 feet wide or larger, any permitted build, or anything intended as living space such as a barndominium — require a poured concrete foundation. On these, anchor bolts are cast into the concrete before the steel is erected, and installation uses cranes or telehandlers.

FrameClear SpanFoundationInstall
Tube-Steel (12–14ga)LimitedGravel, dirt, or concreteSmall crew
Cold-Formed (C/Z)Greater than tubeEngineered slab / footings (lower rebar cost)Crew
Red-Iron (I-beam)100 ft+, no columnsMandatory poured concrete + cast-in anchor boltsCrane / telehandler
02
Get Your Ground Ready

Site Prep
& Leveling

The single most important thing you can do before install day is have your site level. It is the property owner's responsibility, and it decides whether your building sits straight, doors close, and panels line up.

3"
Max Slope Across Footprint
1"
Ideal Target
$4–8/sf
Concrete Slab (Reinforced ~$9–10)
7–28days
Slab Cure Time
  • Ground should be within 3 inches of level across the entire footprint in any direction — closer to 1 inch is ideal.
  • Enclosed, wide, and taller buildings are far less forgiving of slope than an open carport — a lean shows fast on a steel barn or garage.
  • A few inches of slope may be adjusted on install day, but it is not guaranteed.
  • If the site is not level, our crew may shim with concrete blocks, reschedule, or apply a trip charge — and severe slope stops the install entirely.
  • Can't grade level? Options are a poured-level concrete slab, or a ledger / retaining wall built by a concrete contractor.
  • Many municipal codes require a 1/8"–1/2" per foot drainage slope on slabs.
  • This is the customer's responsibility: the pad must be graded, leveled, and compacted before install day.
Call 811 Before You Dig

Before any grading, digging, or anchoring, call 811 (Call Before You Dig) a few business days ahead. It is a free service that marks buried gas, electric, water, and telecom lines. Anchors drive augers and stakes into the ground — you do not want to hit a utility.

03
Room to Deliver & Build

Delivery
& Access

Our delivery truck and crew need clear, stable access to your build site. Confirm every one of these before your scheduled install day.

Image — Delivery Truck
Tilt-bed / rollback truck delivering to a site.
Image — Clearance Diagram
Overhead + around-pad clearance shown visually.
12–14ft
Access Path Width
14ft
Min Overhead (20–25 Ideal)
100ft
Truck Reach to Site
3–15ft
Clearance Around Pad
  • Access path width: at least 12–14 feet wide and firm enough to support a heavy truck and trailer without sinking in mud.
  • Overhead clearance: minimum 14 feet for the truck; 20–25 feet recommended where the crew raises the roof and lift equipment is used. Clear low branches, power lines, satellite dishes, and antennas.
  • Reach: the truck must get within about 100 feet of the build site, with room to turn around, unload, and stage materials.
  • Working clearance around the pad: 3 feet minimum on all sides; 5–10 feet best for residential; 10–15 feet for larger or commercial builds. Forklift/lift access needs 6–8+ feet on the sides for large units.
  • Gates & fences: measure your gate opening first if the building goes in a fenced area.
  • Clear the area of debris, old structures, rocks, and brush; mark septic tanks, drain fields, well lines, and property corners.
  • Large clear-span builds: provide a free-and-clear crane route with horizontal travel room and vertical headroom for the boom; these often require a licensed structural engineer.
04
For Larger & Taller Buildings

Lift
Requirements

Larger and taller units require specialized lift equipment to install safely. If your building meets any of the criteria below, your site must accommodate the lift — firm, level ground and generous overhead clearance with no wires or branches overhead.

Telescoping Lift Required For

  • Any unit 25 to 32 feet wide with double legs
  • Any unit 33 to 60 feet wide
  • Any unit with a leg height of 15 feet or taller
  • Any unit with garage doors measuring 12x12 or larger
  • Any unit with a 5/12 or 6/12 roof pitch that also is either 25–29 ft wide and 11 ft or taller (any leg style), or 29'1" to 32 ft wide (any leg height or style)

Rough-Terrain Scissor Lift Required For

  • Any unit 18 feet or taller

For the largest engineered and clear-span buildings, heavy trusses may require a crane. In every case, the transport vehicle and lift need a free-and-clear route to the site with vertical headroom for the boom.

Image — Lift Equipment in Use
Telehandler / telescoping lift or rough-terrain scissor lift raising a large building on site.
Plan Ahead

If your building requires a lift, we confirm access and equipment when you order. Tell us about tight lots, slopes, overhead wires, or soft ground so there are no surprises on install day.

05
Approvals Before You Build

Permitting

We sell and ship steel buildings nationwide, and most metal buildings require a permit before they go up. Permitting is enforced locally by your city, county, or municipality — so requirements vary by location. Handle this well before install day.

When a Permit Is Required

  • The 200 sq ft rule: a structure of roughly 200 square feet (12x12) or larger generally requires a building permit — even a factory-built, pre-assembled carport or garage. Smaller structures may be permit-exempt but still must meet zoning.
  • Valuation trigger: some jurisdictions require a permit based on project value (for example, $1,000 or more).
  • Type matters: attached vs. detached and permanent vs. temporary affects how it is treated — a foundation-less carport is handled differently than an enclosed building on a slab.

Who Pulls It

  • Typically the property owner's responsibility, and the owner schedules inspections — unless arranged otherwise. A licensed contractor doing the work usually pulls it, but always verify. Benchmark can handle the permitting for you for an additional fee — just ask when you order.

Site-Specific Engineered Drawings

  • Depending on the size or complexity of the building, you may be required to purchase site-specific engineered drawings. These are priced based on square footage and complexity, and typically run between $1,500 and $3,000. Knowing this ahead of time makes you aware of the charge before you order.

What You Will Need to Apply

  • A site plan or plat showing your property lines and setbacks
  • Engineer-stamped building and foundation drawings — many jurisdictions require sealed drawings for metal buildings
  • Septic/sewer information, your 911 address, contractor license info, and the permit fee

Find Your Local Requirements

Because permit rules change from one jurisdiction to the next, the fastest way to confirm what your area requires is to look up your own local building department. Type your city, county, or ZIP code below and we'll pull up your local building-permit office:

06
Where It Can Go

Zoning
& Setbacks

Zoning decides where on your property the building is allowed to sit — and the rules differ everywhere we ship. Confirm all of these with your local planning or zoning office before you order.

Setbacks

  • Property-line setbacks dictate how far your building must sit from the front, sides, and rear of your lot. Most jurisdictions allow accessory structures in the rear and side yards with a required offset — the exact distances vary widely by area.
  • Confirm your specific front, side, and rear setback distances with your local zoning office before finalizing placement.

Easements, HOA & Deed Restrictions

  • Setbacks apply to easements as well as property lines.
  • HOA and deed restrictions are separate and often stricter — a permit does not override them. Check your covenants before ordering.

Flood Zones

  • If your property sits in a FEMA flood zone (A, AE, or VE), you may need an elevation certificate, elevation above the base flood elevation, flood vents or breakaway walls, and additional permits.
  • Check the FEMA Flood Map Service Center for your parcel: msc.fema.gov.

Lot Coverage

  • Many districts cap maximum lot coverage and limit how many accessory structures a property can have. Some require a separate zoning permit above a certain size or for a second building.

Find Your Local Zoning Rules

Zoning is set locally, so look up your own jurisdiction to confirm setbacks, lot coverage, and accessory-structure rules before you order. Type your city, county, or ZIP code below to find your local planning and zoning office:

You can also check whether your property sits in a flood zone by searching a FEMA flood-zone lookup by address.

07
Built to Handle the Weather

Wind & Snow
Load Certification

A certified building is engineer-certified to meet the wind and snow loads required by your local code. Certification is required for any permitted build — and it protects your investment when the storms come.

110–115mph
Typical Inland Wind
140+mph
Coastal / High-Wind Zones
10–35psf
Snow Load Range
12ga
Heavy-Duty Framing
  • Wind zones vary by location: inland areas generally require roughly 110–115 mph ratings, while coastal and high-wind hurricane-exposure zones require 140 mph or more. Your local code sets the required rating for your address.
  • Snow load: typically specified from about 10 up to 35+ pounds per square foot, depending on the building and local code.
  • Steel gauge: heavier 12-gauge framing is stronger and carries better ratings and warranty coverage than standard 14-gauge. We recommend the right gauge and certification level for your location and use.
  • Most areas follow the IRC/IBC building codes, but local jurisdictions enforce and can amend them — another reason to confirm the required rating for your location.
08
Clear Expectations

Who Handles
What

A smooth install comes down to knowing your lane. Here is exactly what Benchmark takes care of — and what you need ready.

Steel Manufacturer Handles

  • Engineering and certified drawings
  • Manufacturing your building to spec
  • Delivery to your site
  • Professional installation and anchoring
  • Guidance on foundation, gauge, and load rating

You Handle

  • Preparing and leveling the site (and any pad)
  • Clear, stable delivery access and overhead clearance
  • Pulling permits and scheduling inspections
  • Confirming zoning, setbacks, HOA, and flood rules
  • Calling 811 before grading or anchoring

Your Before-Install Checklist

  • Site graded level (within 3 inches), foundation ready
  • Delivery path 12–14 ft wide, 14+ ft overhead
  • 3–10 ft working clearance around the footprint
  • Permit approved, inspections scheduled
  • Zoning, setbacks, HOA, flood confirmed
  • Underground utilities marked (811)
  • Lift access confirmed if required
  • Gate openings measured if fenced

The figures on this page are general guidelines to help you prepare. Exact foundation, anchoring, permitting, and load requirements depend on your specific building, site, soil, and local jurisdiction. Final specifications are provided with your engineered drawings, and local code always governs. Contact Benchmark Structures for guidance on your project.

Questions About
Your Site?

Every property is different. Tell us about your lot and how you will use the building — we will walk you through exactly what you need before you buy.

Contact Us Call (843) 490-2488